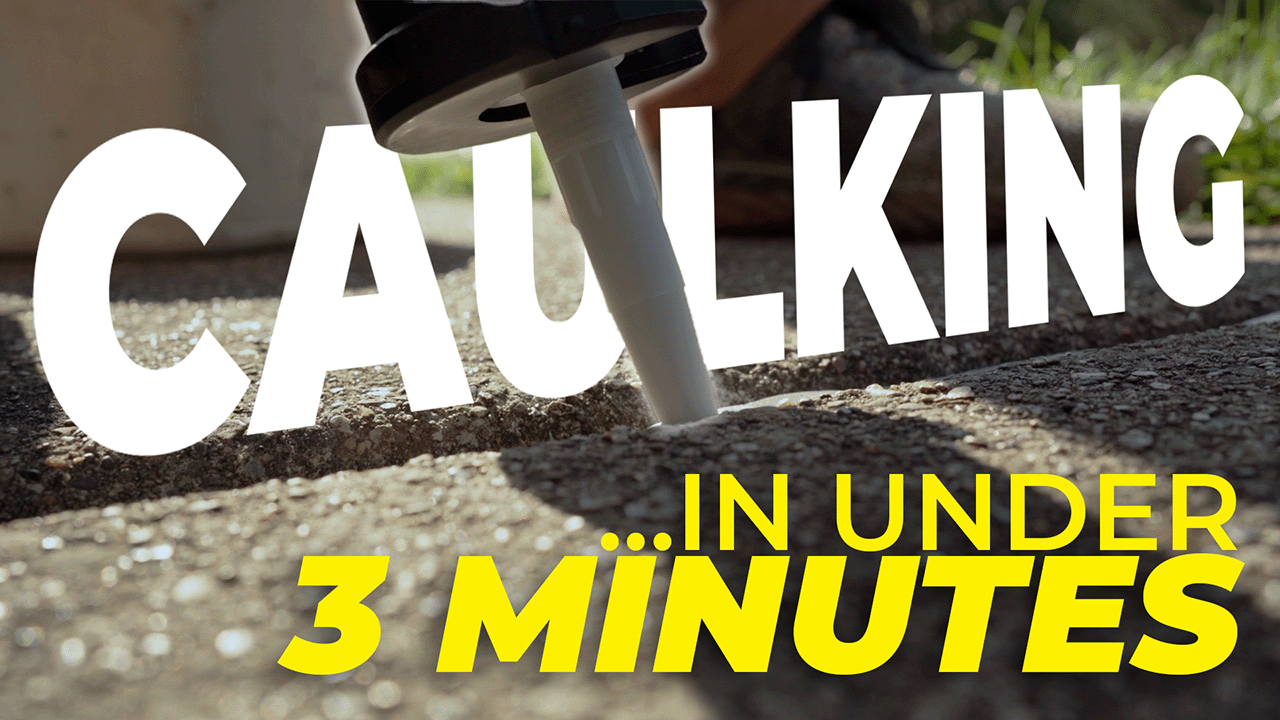
Learn everything you need to know about fixing cracks in concrete.
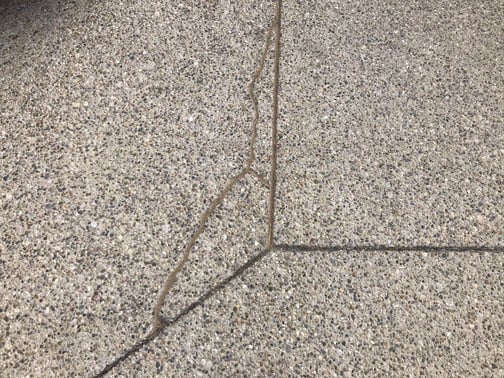
Cracks in your driveway, sidewalk, garage floor, or patio might look harmless, but they’re often open doors for water, weeds, and pests.
If left unsealed, they can speed up slab deterioration, wash away the base underneath, and even cause settlement. Those are bigger, costlier problems that can mostly be prevented with a little proactive maintenance.
TL;DR
Filling and sealing concrete cracks, joints, and gaps is one of the best ways to protect your driveway, sidewalk, patio, or garage floor from water damage, pest intrusion, costly repairs, and even more costly replacements.
- For most exterior slabs – Flexible concrete crack filler or caulk, such as non‑sag or self‑leveling, is the go‑to for sealing cracks.
- For indoor slabs – Garage floors, basements, or pre-coating prep often benefit from epoxy or polyurea fillers for a smooth, reinforced finish.
With the right preparation and maintenance, a concrete crack repair can last for years and keep your surfaces safe and looking their best.
In This Article
- Materials and Tools You Need to DIY Seal or Fill Concrete Cracks
- DIY: How to Fix Cracks in Exterior Concrete (Driveways, Sidewalks, Patios)
- Best Concrete Crack Fillers and Sealers
- Repairing Narrow vs. Wide Cracks
- DIY vs. Professional Crack Repair
- How Long Will a Crack Repair Last?
- Why It’s Important to Repair Concrete Cracks
- Frequently Asked Questions
What Materials and Tools Do I Need to Fix Concrete Cracks?
Before you start repairing cracks in your driveway, sidewalk, patio, or other exterior concrete, make sure you have the right materials and tools on hand. Proper preparation makes the repair faster, cleaner, and more durable – so it can last longer.
Materials
- Flexible concrete caulk or crack filler made for outdoor use (see more details below on types)
- Foam backer rod for deep or wide cracks to save caulk and help shape the bead
- Sand or small stones to blend the repair with surrounding concrete (optional)
- Painter’s tape to keep caulk off areas you don’t want to cover (optional)
Tools
- Caulk gun (manual or electric)
- Cleaning tool such as a 5‑in‑1 tool, screwdriver, or butter knife
- Hose or leaf blower to remove dust and debris
- Spray bottle with soapy water for smoothing the bead
DIY Tip: If you rinse cracks with water, let them dry completely before applying caulk. Moisture in the crack can prevent the caulk from bonding properly.
Concrete Gap and Crack Repair
Protect your concrete from settling and worsening cracks with professional concrete crack repair services.
How do you fill and seal cracks in exterior concrete?
With the right prep and technique, sealing cracks in your exterior concrete can be a quick, rewarding DIY project. You can either watch this video or follow this step‑by‑step guide to fill cracks on your driveway, patio, sidewalk, and other outdoor slabs:
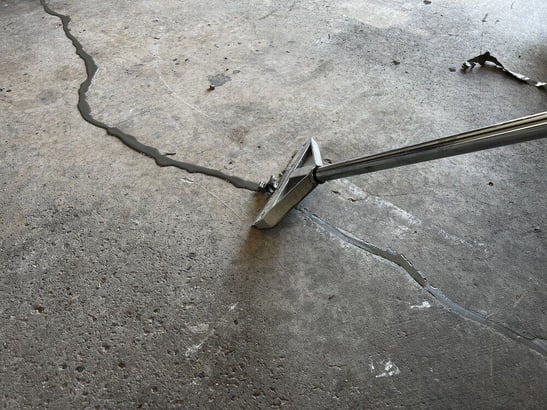
1. Clean the crack
Remove dirt, weeds, loose concrete, and any old filler. Blow or rinse out dust and debris. Don’t forget to let the crack dry before taking the next steps!
2. Insert backer rod for deep or wide cracks
Press foam backer rod into place for cracks deeper than ½ inch. It saves caulk, shapes the bead, and improves adhesion.
3. Prep the caulk
Remove dirt, weeds, loose concrete, and any old filler. Blow or rinse out dust and debris. Don’t forget to let the crack dry before taking the next steps!Cut the nozzle at a slight angle (just smaller than the crack) for better control. Load the tube into the caulk gun.
4. Apply the caulk
Hold the tip just below the surface, apply steady pressure, and move at a comfortable speed along the crack. Slightly overfill for easier smoothing.
5. Smooth the bead
Spray soapy water on your finger or a finishing tool. Smooth the caulk so it sits just below the concrete surface.
6. Blend in (optional)
Sprinkle sand or small stones over the wet caulk to match surrounding texture. In some instances, this step does provide functional value, but it’s more of an aesthetic choice than anything.
Pro Tip: If one side of a crack is higher than the other, you should first consider concrete leveling for a more even surface overall and potentially prevent further cracking from natural movement.
Why It’s Important to Repair Concrete Cracks
At this point, you know the basics of how to seal cracks and what you need to do that yourself… but do you know why? Cracks in concrete are more than just an eyesore. They’re open pathways for water, dirt, and pests to enter, and over time, that intrusion can:
- Wash out the base supporting the slab
- Cause uneven settling and trip hazards
- Speed up surface deterioration
Example: In areas where freeze-thaw cycles are common, water gets inside a crack that freezes, expands, and pushes the crack wider before thawing and repeating the cycle through the season. This cycle can turn a hairline crack into a major repair project.
By repairing cracks proactively and promptly, you can prevent costly replacements, protect against safety hazards, and extend the life of your driveway, patio, sidewalk, or other concrete surfaces.
Lead to freeze‑thaw damage in colder climatesExample: In areas where freeze-thaw cycles are common, water gets inside a crack that freezes, expands, and pushes the crack wider before thawing and repeating the cycle through the season. This cycle can turn a hairline crack into a major repair project.
By repairing cracks proactively and promptly, you can prevent costly replacements, protect against safety hazards, and extend the life of your driveway, patio, sidewalk, or other concrete surfaces.
Best Concrete Crack Fillers and Sealers
The “right” crack filler or sealer depends on a number of factors including the location, crack size, and your repair goals.
Flexible Concrete Caulk (for Exterior Slabs)
- Non-sag and self-leveling concrete caulk bonds to concrete’s roughness and flexes with natural slab movement, seasonal temperature changes, and moisture shifts. We recommend these options for driveway crack repair, patios, sidewalks, and other outdoor slabs.
DIY Tip: Some projects require a combination of the two to create the cleanest finish on complex repairs. This makes it especially important to understand how to use either properly as their application processes and uses differ.
Polyurea Crack Filler
Polyurea is a two‑part, fast‑setting, semi‑rigid repair material that is used to reinforce cracks, strengthen the concrete, and repair spalled or damaged joints.
- Often used for garage floors and commercial spaces before applying coatings.
- This method requires a lot of prep work and precision, which may be a good reason to consider a pro for this application vs. DIY.
Related Resource: How To Fix Cracks in Garage Floors
Epoxy Crack Filler
Similar to polyurea, epoxy crack filler is a sandable, crack-reinforcing two-component material.
- Available in DIY kits, but requires more prep work and a more complicated process than standard caulking.
Concrete Patch
- Inexpensive and easy to find.
- Best viewed as a short‑term fix.
- Rigid and prone to cracking, chipping off, or popping out as the slab moves – sometimes in a matter of months.
Mortar or Grout
- Similar to concrete patch in rigidity (and our stance as it being a temporary fix).
- Does not flex with the slab.

Repairing Narrow vs. Wide Cracks
Narrow Cracks (<¼ inch):
- Can usually be filled directly with caulk — no backer rod needed unless deep.
- Ideal for quick DIY sealing to stop small cracks from spreading.
Related Resource: Types of Concrete Cracks + What They Mean
Wide Cracks (>¼ inch):
- Often require foam backer rod (or filled and packed with sand or similar filler) to reduce caulk volume, level application, and proper bead shape.
- Sand or small stones can be used under backer rod in especially deep cracks.
DIY Tip: Oversized gaps can be filled with a cut‑to‑fit pool noodle as a large‑diameter backer rod alternative.
DIY vs. Professional Crack Repair
| Factor | DIY | Professional |
|---|---|---|
|
Aesthetics |
Good results are possible with patience, but bead lines may be uneven |
Smooth, uniform finishes that blend in |
|
Time |
Plan for a weekend if it’s your first time |
Usually done in a couple of hours |
|
Cost |
$10–$12 per tube of exterior caulk (tools extra) |
Higher upfront cost, but includes labor, expertise, and often a warranty |
How Long Will a Crack Repair Last?
The life of a crack repair depends on:
- Product quality
- Prep work
- Environment and slab movement
Flexible caulk can last several years with occasional touch‑ups. Check repairs once or twice a year and reseal any areas showing gaps or pulling.
Keep Your Concrete Protected
Cracks will only get worse if ignored. Whether you DIY or hire a professional, sealing cracks now can prevent expensive repairs and extend the life of your slab.
A-1 Concrete Leveling can help you get ahead of the damage with a clean, professional caulking job that’s built to last – and that all starts with a free estimate.
Request your free estimate today!
Still Deciding?
- Types of Concrete Cracks and What They Mean
- 5 Reasons to Repair Concrete Cracks
- How Much Does Concrete Caulking/Crack Repair Cost?
Frequently Asked Questions
What’s the best way to fill cracks in concrete?
Clean the crack, insert backer rod if needed, and fill with a flexible concrete caulk or sealant. For interior slabs, epoxy or polyurea provides a smooth, reinforced finish.
Should I seal cracks in concrete?
Yes. Sealing cracks helps prevent water damage, slab settling, and freeze‑thaw deterioration.
How do you fix cracks in a concrete slab?
Follow the same cleaning and filling process, but select the filler based on whether the slab is indoors or outdoors.
Which is the most common crack repair method?
Flexible concrete caulk for exterior slabs; epoxy or polyurea for interior slabs, especially if a coating will be applied.
Does concrete sealer fix cracks?
No. Concrete sealers (like topical or penetrating sealers) don’t fill gaps between slabs – they primarily protect the surface. In some cases, they can make cracks more noticeable.
Let the crack filler fully cure before using the garage like normalRelated Resource: How to Fix Cracks in a Garage Floor
Let the caulk set completely
Related Resource: Concrete Driveway Crack Repair – DIY Guide
Garage Crack Repair
Repairing cracks in a garage floor can be done with epoxy, polyurea, or flexible concrete caulk, and there are unique benefits to each. For installing epoxy and polyurea crack fillers, follow these steps:
Grind the cracks so there are uniform edges for the crack filler to bond to
Clean any dust, chunks of concrete, and debris from the cracks
Add crack filler to the crack, overflowing it slightly
Scrape or shave down the excess material from the filled crack
Let the crack filler fully cure before using the garage like normal
Related Resource: How to Fix Cracks in a Garage Floor
Sidewalk Crack Repair
Sidewalk slabs often settle and crack, creating an uneven surface to work with when repairing cracks.
For that reason, it’s important to lift the settled slabs with concrete leveling to get the edges of the crack even before attempting to repair it with the same steps as the driveway crack repair above.
Concrete Gap and Crack Repair
Protect your concrete from settling and worsening cracks with professional concrete crack repair services.
Topics: